Create an Azure Data Factory
How to create an Azure Data Factory.
Workflow
- Create a GitHub repo to save changes
- Create a Data Factory
- Use
Save allto commit Data Factory changes to the repo - Use
Publishwhen developing and you know the pipeline runs without issues.
Create a GitHub repo
- Go to GitHub and create a repo.
- Set to private. Initialize with a Readme
Create an Azure Data Factory
- In the Azure portal
- Create a resource
- Search for
data factory - Select a
subscriptionand create aresource group - Enter a
name, aregionand keep theversionasV2 - In
Git configurationkeep the defaultConfigure Git later - Go to
Review and CreateandCreate
Self-Hosted Integration Runtime configuration
See: Azure Data Factory Self-Hosted Integration Runtime
- Networking
- Self-hosted integration runtime inbound connectivity, set to
Private endpoint
- Self-hosted integration runtime inbound connectivity, set to
- Private endpoint connections
- Click
Create a private endpoint - Select subscription and resource group
- Enter a name like
onprem-ir-endpoint - On
Networking- Select the virtual network
onprem-vnet (onprem-azure-dw) - Select subnet
default- A message says
If you have a NSG enabled for this subnet, it will be disabled for private endpoints on this subnet only. Other resources on the subnet will still have NSG (network security group) enforcement.
- A message says
- Select the virtual network
- On
Private DNS integration- It says
To connect privately with your private endpoint, you need a DNS record. We recommend a private DNS zone. You can also use your own DNS servers or create DNS records using the host files on your VMs - Set to
Yes - Private DNS Zone: Leave default
(New) privatelink.datafactory.azure.net - Click OK, then select it with a checkbox
- It says
- Click
Add the GitHub repo to Data Factory
In Data Factory, add the repo:
- In the Manage interface, Source Control,
Git configuration
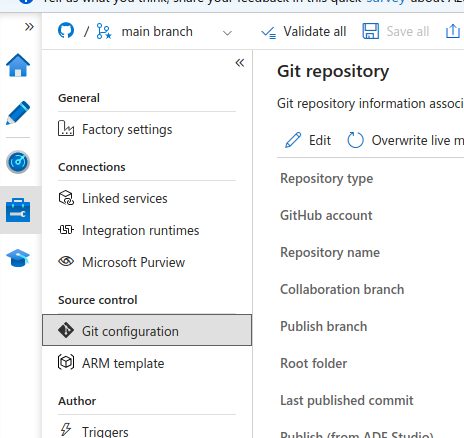
Select a GitHub repo:
- Enter the
GitHub repository owner(your GitHub username) - Authorize AzureDataFactory to access GitHub
- Select the repository you created
- Use the
Collaboration branchasmain - Leave the default
Publish branchasadf_publish - Leave the default
Root folder - Check
Import existing resources to repository - Leave the default
Import resources into this branchand selectmain - Go to the GitHub repo and refresh to see updates
Optional: Work in a branch
In Data Factory, top left, a main branch will show up.
- On this drop down, click
New branch - Enter a branch name
- Do some work and click
Save all. This will save the changes to the branch. And you can verify this in GitHub repo. - Create a PR from the Data Factory or from GitHub